Monday, January 29, 2024

Hey There Love Bug!


Just a quick post today for a quick card to make.

I had a friend who needed a card right away that had a "Love Bug" sentiment. So I kept this one to dies only.

I used an older printed gingham paper that Lawn Fawn came out with a couple of years ago. The edges are inked with Mustard Seed Distress Oxide. I used Claire's ABC's to stamp part of the sentiment, then cut the letters from Red Barn cardstock and white cardstock using Finley's ABC's. I highlighted the letters with a white gel pen.

I cut the leaf from Cilantro and Noble Cardstock using the Lady Bug and Leaf Die. I cut the lady bug from Guava, Licorice and Bard Red Cardstock. I did do a little inking on the Cilantro part of the leaf with Rustic Wilderness Distress Oxide to soften it a little.

I sprinkled the card with a few hearts that I had previously cut using the Hearts and Stars Skinny Tag,.

This is a very quick card that packs quite a punch with it's simplicity and color. I hope you might decide to give it a try.

Thanks for stopping by. Have a super day!

Sandy

Sunday, January 28, 2024

Riding By Valentine


Hello again friends! I am still having some fun with Valentine's Day cards. I think the little mice are my favorite critters that Lawn Fawn does.

For this card, I did a little bit of masking to get those hearts, mice and mail in the little wagons. It wasn't too hard so I would encourage you to watch my video to see how I did it. I also had some fun inking the background. I wish that Lawn Fawn had a Slimline Mountain Stencil which can also be seen on my YouTube Video.

The Distress Oxide Inks that I used on the background are Cracked Pistachio, Lucky Clover, Spun Sugar, Kitsch Flamingo and Tumbled Glass. The stencils that I used are the Slimline Grassy, Slimline Cloudy and the Mountain Stencil. I added hearts to the mountains using the Falling Hearts stencil.

The stamp collections I used are: Hay There, Hayrides, Hay There, Hayrides Mice Add On, Simply Celebrate Hearts, Oh Gnome, You Are Sublime, and Special Delivery.

I used Copic Markers in the following color combinations:

Reds:  R14, R29, R39

Pinks:  R11, R20, R22

Browns: E30, E33, E35

Blues: BG000, BG01, BG02

Grays: C1, C3, C4, C5, C6

To finish up the card, I added a little bit of glitter to the edges of the snow on the mountains, The card also needed a little something in the sky, so I used the Puffy Cloud Frames Die to cut out some clouds from white cardstock.

I love the way the little trailers turned out and I hope you do also.

That's all I have for today. Thanks for stopping by and I hope are doing well!

Sandy

My You Tube Video


Thursday, January 18, 2024

Be Mine Valentine


Hello! I have another Valentine today. It doesn't have the traditional colors but it has the traditional symbols. I am really enjoying playing with the new release from Pretty Pink Posh and I hope you enjoy reading about how I made the card. 


I started out with a piece of white cardstock cut at 5" x 6".  I like that size because it gives me a little wiggle room when I cut it to size.  I am using the Layered Argyle Stencil on a piece of pink cardstock. For the first layer I am using Kitsch Flamingo Distress Oxide Ink. For the second and third layers, I used Picked Raspberry Distress Oxide Ink. I lightly speckled the paper with watered down ink to add some dimension.

For my card background, I am starting with a piece of cardstock cut to 5.5" x 7.75" . I will score it at 3.5". I have cut a piece of acetate, 1" x 5.5" and I will apply it withe strong glue tape at the bottom of the 3.5" end of my card. I will center and glue the XOXO Heart Border on the acetate. And then cut off the extra pieces of the border at the edges.

Next I will trim my paper that I have stenciled to 5.5" x 3.5" and glue that above my XOXO Heart Border.

I have stamped the three cupcakes that I am using from the Valentine Cupcakes Stamp Set for this card . I am using Xpress It Blending Card and Copic markers to color the images in.

The colors I am using are:

  • Pinks: RV02, RV04, RV06
  • Purples: V01, V12, V15
  • Yellows: Y13, Y15, Y17
  • Reds: R29, R30, R32, R35

I usually add a little bit of glitter to most of my cards unless I am using a gel pen to highlight. For this card, I used a glue pen and drew the glue where I wanted it and then dipped the cupcake in micro prisma glitter. You could also use Stickles if you have the time to wait for them to dry.

I used the new Hot Foil Be Mine plates with the Be Mine Shadow Dies for the sentiment. I didn't have the right shade of yellow cardstock, so I used Squeezed Lemonade Distress Ink to color my white cardstock after I foiled it. I do that often, you just have to remember to buff off the ink on the foiling.

The fun part is always putting everything together to finish the card. I really like the way this card turned out. I think that the cupcakes are just darling and could definitely be used for any time of the year.

Thank you for stopping my today. I hope you are having a great day!

Sandy


My You Tube Video


You Are Sweet!


Hello! I am still in that Valentine mood. How about you? I think that this card could be given to someone who just has a sweet tooth also.

I am really enjoying Pretty Pink Posh's Valentine's release. I made a card a couple days ago where I put the XOXO Heart Border at the bottom of the card, so this time, I am going to put it up into the body.

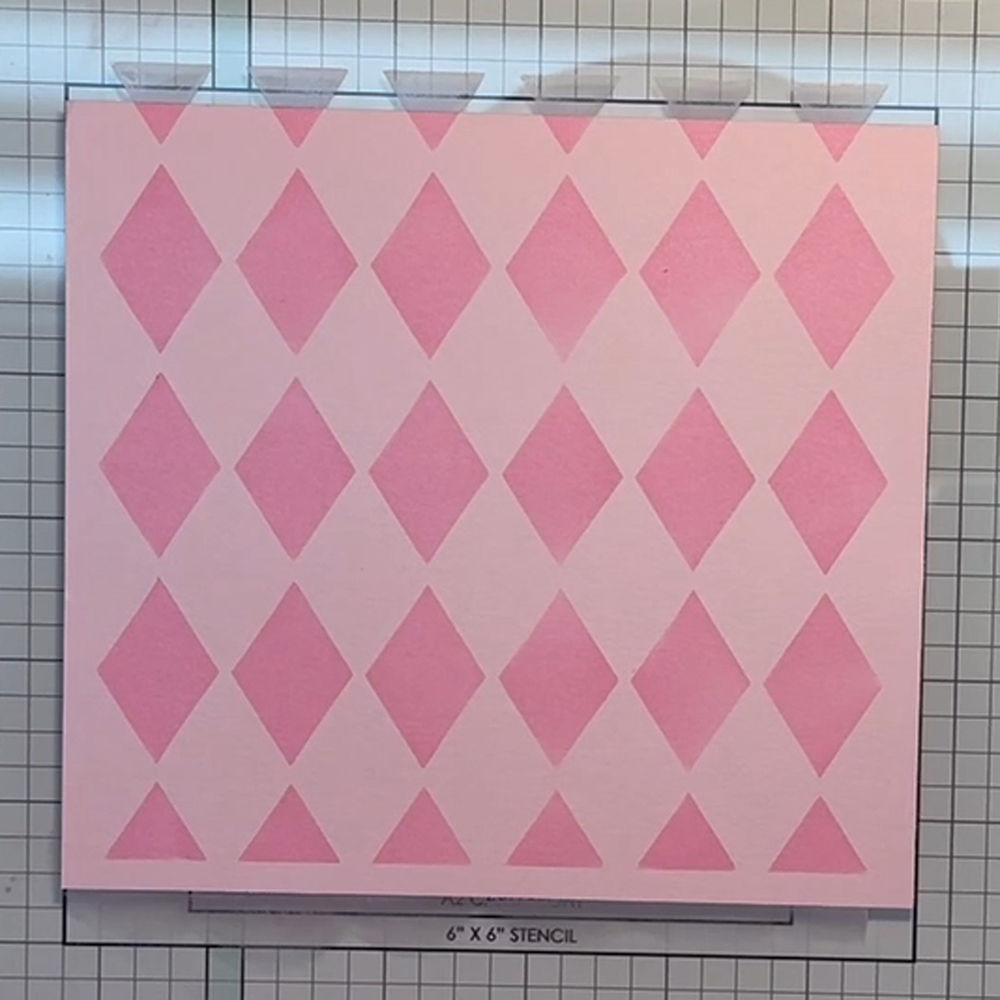
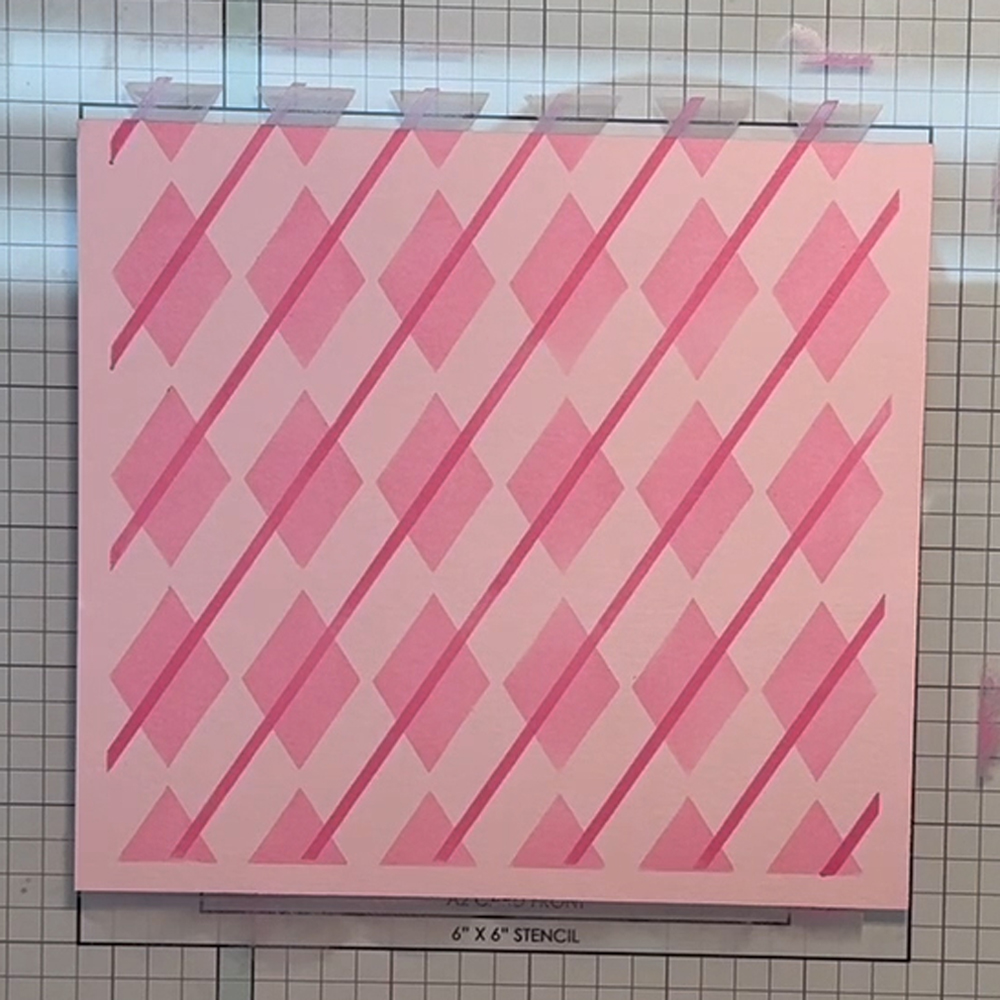
I have used the new Layered Heart Lattice Stencils with Kitsch Flamingo and Prize Ribbon Distress Oxide. I watered down both colors and speckled my paper to tone down the harshness of the white. I am going to cut that to 5.5"x 4.25". Because I used a die with a decorative edge, I will then cut it again, so I have a piece, 5.5"x 2.375 and one 5.5"x 1".

I will cut my card base, 5.5" x 6.625". You will still score it 4.25" from one end. I am also going to cut a piece of cardstock 5.5"x1" to cover where I will be attaching the acetate.

I will place strong glue tape on the cut edges of my patterned paper and apply a piece of acetate cut to 5.5"x125" in between the two making a window to place the XOXO Heart Border. I will center and glue that border on trimming the excess from each side. I will then glue my patterned paper to the short side of the cardstock base and use the smaller cardstock piece to cover the acetate and a glue strip on the lower part of the card.

I have cut some lighter pink hearts using the heart die that comes with the XOXO Heart Border Die and glued them on to add some contrast.

***I have a video on YouTube that makes this whole a lot clearer and easier to follow!

Now it's time to color. I have stamped all of the chocolates from the Sweet Chocolates Stamp Set. I wanted all of my candy pieces to be chocolate, so I am using browns.

I have used Copic Markers in the following colors to match my paper.

  • R24, R29, R83, R85
  • RV06
  • E11, E13, E15, E31, E33, E35, E23, E25, E27, E29

I highlighted all the chocolates and hearts with a white gel pen instead of using glitter for this card.

I adhered some hearts from the new Heart Cover Plate Die, on the upper part of the card to add some color and interest. I then popped up the chocolates and hearts and sprinkled them across the card.

I used the sentiments from the stamp set. I heat embossed those with embossing powder but I have no idea the name of brand but was absolutely delighted that it matched so well.

I think that this card is just delightful and I hope you do also. Thank you for stopping by, and I hope that you are having a "sweet" day!

Sandy

My You Tube Video

Wednesday, January 17, 2024

Will You Bee Mine?


Hello again! Today I worked on a Valentine's Day card for the current Lawn Fawn Blog Challenge # 165-Lots of Heart

The little bee keeper on this card was a freebie with purchase during the May 2023 release. I hadn't had a chance to use it until today and I think that he is a keeper. The name of the stamp set is You're A Keeper. It isn't currently available, but I am thinking that they may release it at a future date. I would keep checking their website.

I used the Magic Iris and the Magic Iris Heart Add On for this card. I inked the background with Broken China Distress Oxide and the Cloudy Stencil for the sky. I speckled the sky with watered down ink for dimension. For the grassy area, I used Mowed Lawn touched up with Lucky Clover along with the Grassy Stencil. I spattered the grass with watered down Lucky Clover ink.

I highly recommend watching the Lawn Fawn tutorial on how to assemble this mechanism. It goes step by step and I still refer to it when I make one of these cards.

I heat embossed the sentiments on this card with black embossing powder using Henry Jr's ABC's.

I personally like hot foil on my cards so if I get an opportunity to do it I will. I used the Stitched Trails Hot Foil Plate with Red Glimmer Foil.

The stamp sets that I used for this card are: You're A: Keeper, Hive Five, Apple-solutely Awesome and You Goat This.

The Copic Markers I used are:

  • Grass:  YG05, G09
  • Bee Box, Signs: E55, E57, E59
  • Honey Jars, Hat, Gloves & Boots: Y13, Y15, Y17
  • The Reds on the card: R14, R27 and R46
  • Beekeeping Veil: R02
  • Bear: E31, E33, E35
  • Jar Labels, Bee Wings & Signs: BG000, BG01

The B - E -& E are cut from black and yellow cardstock using Henry's ABC's. I layered them and then highlighted them with a white gel pen.

As I was making this card, I was thinking about all the other cards I've made with these same images.

As always, thank you so much for stopping by and I hope you are having an awesome day!

Sandy

My You Tube Video


Sunday, January 14, 2024

Hugs & Love


Hello my cardmaking friends. It has been freezing here in Colorado. We don't get below zero often here in the metro area, but we have been for a few days now. What is a girl to do when it is just too cold to go out? Make cards of course.

This card has some new arrivals from Pretty Pink Posh. I think they have some of the cutest things card making things and I just can't resist cute!

I inked two separate pieces of white cardstock.  I usually cut my cardstock to  5” x 6” to give myself a little bit of wiggle room.  I used the Layered Heart Lattice Stencil and the Valentine Words Stencil.  I like how easy it is to use their multiple layer stencils.  They each have a letter in the lower right corner and all you have to do is go in order and line up the corner.  Easy peasy.  I used Distress Oxide Ink in Lumberjack Plaid.  I did lightly speckle each piece with watered down ink.  By doing this, I toned down the white a little bit.


  I cut each piece to 5.25” x 4.0 “and then cut them into four equal parts.  I flipped them over and then temporarily tapped them together and then placed a 3” circle die in the center of the piece.  Once I had run both pieces through my die cutter, I swapped the paper in each corner so that my background had a little interest.  I trimmed the inside edges of each piece .125” so that I would have a slight area of the cardstock showing between each piece.  I also inked the edges to soften the harshness of the white. 


I cut my foam tape to make a little well so I can add my sprinkles.  I glued a piece of acetate on the back of the front of my card if that make any sense. 


I used the Large Hugs Shadow Die and the Large Love Shadow Die with pink and red paper for my sentiment. I colored the little bear from the Valentines Cupcake Stamp Set and glued him in the center of the shaker window.


  That is all there is to this fun card.  I hope you enjoyed this post today. I hope that you are having a great day and are staying warm or cool as the case may be.

Sandy

My You Tube Video


Tuesday, January 9, 2024

Quill You Be Mine?


Hello my card making friends! I have a snow globe collection but most of mine are either everyday Disney or Halloween. I thought it would be fun to make a Valentine themed snow globe for this card.

It had been awhile since I had made a shaker card and this turned out to be a little trickier than I thought it would be because I used a slimline card which didn't give me much room to work with at the top or bottom.

I cut Ballet Slippers cardstock with the Scalloped Slimline With Hearts. I cut five more pieces the exact same way out of white cardstock. I centered the Build A Snow Globe die and cut each layer the exact same way so that when the all the white cardstock is glued together, there is a well created for the shaker pieces. My YouTube video shows it a little better than I can explain it.

For the ink blended piece, I cut the paper at 3.125" x 10.125". Using Tumbled Glass Distress Oxide Ink and the Cloudy Stencil to create clouds on the upper part of the background. I cut patterned paper for the ground and used Twisted Citron to make it a little more green and then touched up the edges with Mowed Lawn. I used the same color combination for the stems and leaves for the Heart Garden Stencil. The hearts are inked with Kitsch Flamingo and Picked Raspberry.

The stamp sets that I used for this card were: Porcu-Pine For You, To My Fungi, and Butterfly Kisses.

The Copic Markers that were used are:

  • Mushrooms: RV11, RV13, RV14, YR20, YR21, YR23 C1
  • Snails & Flowers: BG000, BG02, Y02, Y18
  • Butterflies & Flowers: R20, R22

I heat embossed the "Quill You" and the "I Love You". The "Be Mine" was cut from Barn Red cardstock using the Scripty Be and Scripty Mine.

This would be a really quick card to make if you forego the shaker element and just have the illusion of a snow globe. I don't know what do you think?

Thank you for stopping by and I hope you are well and are having a great day.

Sandy

My You Tube Display

You're A Super Star


As I was looking through my cardstock, I didn’t find a color that I liked for the mushrooms so I decided to use Vanilla Malt Cardstock and used Distress Oxide Ink to color it the way I wanted it them to be.

I started with the mushroom tops.  I blended in Abandoned Coral from the outside in and then with a smaller brush, added Candied Apple.  Then I speckled them with watered down Candied Apple.  For the stems, I blended with Gathered Twigs from the outside in, then speckled them with the same color.

I cut a piece of cardstock for the ground using the Simple Stitched Hillside Border die and inked it with Cracked Pistachio and the shaded it with Pine Needles and then speckled it with the same color. 


I stamped out the mice from Super Star and Bubbles of Joy. Then colored them with Copic Markers.

I used the following colors: Y13, Y15, Y17, E53, E51,E30, R20, R22, E50, C1, C2 and C3.


I heat embossed the sentiment with white embossing powder.  I also heat embossed the stars and constellations with silver embossing powder. 

As I was laying out my scene, I had to overlay my large mushrooms so that the telescope would be in the right place but it created too much paper bulk so I had to cut down the back mushroom to eliminate it.  I was then able to glue the mushrooms down without the extra bulk.  I added foam tabs to my mice and telescope and placed them on my mushrooms.


I dug out some glittered stars from my little stash bowl that I had previously cut from the Hearts & Stars Skinny Tag die set and then glued them randomly in the sky.   I place the yellow star in the upper right hand corner. At first I was just going to leave the constellation that made up a star shape, but it just faded too much into the background. I had thought about cutting a silver glittered cardstock star but the yellow one just added the "pop" I was looking for.

I really like the way the way the mushrooms turned out. I will probably use that color combination again in another card.

Thanks for stopping by and I hope you are having a great day!

Sandy

My You Tube Video

Monday, January 8, 2024

We Said Yes!


Hello! This past summer our youngest son proposed to his girlfriend and she said ...Yes!!! We couldn't be more excited and happy to welcome her and her son into our family. They have set the date and they are in the process of sending out their "Save The Date" cards. Even though it isn't going to be a big wedding, I will not be making the invitations - which is just fine with me because I am more of a one and done kind of girl. It did, however, get me thinking that if a couple had already gotten married and wanted to just have a reception, then you would need a totally different type of card. So, that train of thought brought me to making a card for Lawn Fawn Blog Challenge #164- Let's Celebrate.

For this card, I started by inking the background. I used Distress Oxide Ink for all the inking. For the grass, I used Twisted Citron and Mowed Lawn with the Grassy Stencil. For the mountains, I used the Mountain Stencil with Hickory Smoke and for the clouds, I used the Cloudy Stencil with Worn Lipstick.  


While it seems to be a shame to cut this background, I used the new Radiant Heart Backdrop to finish my background.


  The stamp sets that I used are: Porcu-Pine For You, Bicycle Built For Two and Henry Jr's ABC's. I had stamped the rocks from Wild Wolves thinking that I may need them for some height, but I wound up not having to use them.

The COPIC colors are:

  • Trees & Stum: E21, E23 and E18
  • Porcupines: E31, E39, E57 E41. E42, E43
  • Leaves: YG03, G07
  • Mushrooms: R14, R27, C0
  • Flowers: R20, R22, Y03, Y08
  • Veil: R20, R22, C0
  • Snail: R20, R22, BG000, BG02
  • Top Hat: C5, C6, R14, R27

The dies that I used for this project are: Radiant Heart Backdrop, Shadow Box Ocean Add On and Henry's ABC's

This turned out to be such a cute card. Of course I still had to put my favorite porcupine on the card, this time just the little on. He is such a chunk and he make me smile.

I have a video posted on YouTube on how the background was created. I am certain, that I will be using it in the future for other cards this spring.

I hope you enjoyed reading about this card. Thank you for stopping by and I hope you have an amazing day!!!

Sandy

My You Tube Video

Thursday, January 4, 2024

You Prickle My Fancy


Hello my cardmaking friends! I am still playing with those silly little porcupines and having the best time. I'm not sure if I even made a Valentine's Day card last year. Hmm....I am going to have to go back and look.

Today I am using the Magic Iris and the Magic Iris Heart Add On. Nothing says Valentine's day better than those chalky candy conversation hearts so I used the Candy Hearts die to cut out hearts from different colors of shimmer paper.

I cut the Magic Iris Heart Add On and the little sausage looking pieces from the Magic Iris die out of white shimmer paper. I used Spun Sugar Distress Oxide Ink on the outside edges of all the pieces and around the heart cut out. I speckled the pieces with a metallic pink water color paint to add a little interest to the background. I used regular cardstock for the rest of the Magic Iris mechanism.

Once I glued the Candy Heart on the card, I felt like the wording on the hearts didn't stand out very well, so I cut out the hears again in a different color and glued in the lettering to help the words stand out.


  I used my favorite porcupine again for the front of the card along with other elements from both the Porcu-Pine For You and Porcu-Pine For You Add On stamp sets. I love the little cactus he is holding. It is perfect for the sentiment that I chose.

The Copic Makers I used are as follows:

  • Porcupine:
    • Spikes: E47, E44, E43, E42
    • Body: E55, E53, E51, E50
    • Cheeks & Ears: R21
  • Tree Stump: E79, E74, E71
  • Reds: R29, R24, R21
  • Greens: YG09, YG03
  • Blues: BG000, BG01, BG05
  • Gray: C0

I usually color more pieces than I need because I am not sure what I am going to use. I glued the elements that I decided on at the bottom of the card. I added hearts cut from scraps of shimmer cardstock using the Hearts and Stars Skinny Tag die to fill in some of the blank spaces between the candy hearts.

For the sentiment, I cut up the sentiment from the Porcupine for You Add On set and stamped it on the heart cut from Ballet Slippers Cardstock using the Magic Heart Messages die.

Thanks for stopping by and I hope that you are not only having a wonderful day but that you have a wonderful New Year!

Sandy

My You Tube Video

Special Delivery


Hello and happy January! I feel like I have gotten so much accomplished in the last few days. We had our final Christmas celebration with my youngest son and his soon to be wife and her son last Thursday. Since then I have taken all the Christmas down inside and out and had time to make a few cards. I love it!

This card just make me smile! Everything about this card was just plain fun to make.

When I first saw this die, Stitched Happy Heart, I immediately thought that that he needed some legs to go on a stroll. As it turned out, the die has pieces in it that work just perfectly. I used the headband for the legs and the cheeks for the feet. For the feet, I just cut a sliver off one side to make it flat and then I drew on some laces and soles. Easy peasy! I flipped one arm so that it was waving. I had initially planned to put something in his hand but everything I tried didn't look right.

For the background, I used Distress Oxide in Tumbled Glass along with the Cloudy Stencil to make the sky. I then used the Cloud Background Hot Foil Plate with Cobalt Glimmer Hot Foil. The ground is a piece of Cilantro Cardstock cut to about 1.25" wide with the Grassy Border. I added a little bit of Mowed Lawn Distress Oxide Ink to the edges to add dimension.

I used a few different stamp sets for the Valentine mail: Love Letters, Special Delivery and You're Just My Type.

The Copic markers for this project are:

  • R20, R21, R22, R14, R27 and C0

This is such a fun and quick card to make. I hope you have been inspired by this happy little guy.


Thank you for stopping by my blog and I how you are having a great day!!!

Sandy

My You Tube Video