Saturday, September 28, 2024

Life Is Gourd


Hello!  Today I have a card that I created with no other than one of Trinity Stamps gnomes.  This happy little fellow is just pondering life on a Jack o'Lantern.  The name of this set is Life Is Gourd.

I had originally planned to put him on a card that I had cut from the Pumpkin Shaped Card Die Set,  unfortunately, I got carried away ink blending and I damaged the fold.  No worries, I applied what I had done to a piece of plaid patterned paper.  

Once I cut out the pumpkin, I used the Grassy Hillside Border from Lawn Fawn to ink i the grass.  I used Mowed Lawn and Rustic Wilderness Distress Oxide Ink.  I also used their Cloudy Stencil to place clouds with Tumbled Glass ink.  I cut the stem from green cardstock and touched up the edges with a little Rustic Wilderness ink.  I tied on a little twine bow to add a little something to the card for dimension.  

Since I cut my pumpkin card at the fold, it was a wee bit flat on that edge, so I thought I would draw the eye away from that area by adding some corn stalks from the Scarecrow Gnome stamp set.  I don't know that it was all that important to do that, so if you don't have that set, the card is just as adorable with the little gourd gnome.  I added a little crow to the top of he pumpkin because - why not?  

I heat embossed the sentiment using the sentiment from the set using white embossing powder.  

All the images were colored with Copic markers in the following colors:

  • E53, E55, E57
  • T0, T2
  • YR24, YR27, E07
  • Y35, Y38, YR04 YR07
  • E50, E42, E43
  • B41, B91, B93
  • E00, E02


I am just crazy about my little friend here and he's right - "Life Is Gourd" especially in the fall.

Thank you for stopping by and I hope you have an amazing day!


Sandy


Tuesday, September 24, 2024

It Might Be Corny


I'm back with another Trinity Stamps gnome.  They are always my favorite and I just love coloring them.

For this card, I wanted it to be a bit of a patchwork, so I used some patterned paper from Lawn Fawn.  The paper is from the Falling Leaves Petite Paper pack.  I really like Trinity Stamps A-2 Tree Frame Die.  In fact I love it so much I accidentally ordered two of the.  I hate when I do that!!!

The stamp set is Scarecrow Gnome.  He is colored with Copic markers in the following colors:

  • BG000, BG01, BG02
  • E000, E01
  • YR21, YR23, YR24
  • E33, E35, E37
  • YG61, YG63, YG67


I don't think he is corny at all!  I don't always put my cards on a card base, but this one has and it is going to be put in the mail tomorrow!

Thanks for reading and you are "a-maize-ing".


Sandy


Monday, September 23, 2024

Boo-vie Time


Hello, it’s me again with another fun Halloween card using the Popcorn Bliss digital stamp.  I wasn’t sure what I was going to do with this stamp, but my son, daughter in law and grandson invited me to go to the “BOO-vies” to see Beetlejuice 2 since it was “Now Screaming”.  My youngest son can pretty much make a pun of anything. 

For the background on this card, I wanted to have a movie clapboard for the base. I used black cardstock and a white gel pen to draw the lines.  For the striped area at the top, I used the Diagonal Stripes Border by Lawn Fawn.  For the stamped sentiment, I used their Claire’s ABC’s stamp set and black heat embossing powder.  The die cut letters are cut from yellow and orange cardstock.  I used Lawn Fawn’s  Oliver’s Stitched ABC’s to cut them out. 

I used the ghost at its original digital size.  The coloring was done with Copic markers in the following colors:

  • V04, V06, V09
  • C0, C1
  • R20
  • YRO2, YR04, YR07


 Once I had the ghost and letters placed, I needed a little something for the space under the “Boo”, so I found a little spider from Lawn Fawn’s Cute Cobweb die set. 

 I think this is a cute card even if it is a little pop-corny. 

 Thanks for reading and I hope you have a great day!

 Sandy


Happy Howl-O-Ween!


Who wouldn't jus love to go out trick or treating with this fun crew?  I know I would.

This card was one of the ones that I played around with Distress Oxide Inks to create the background this past weekend.

To start out, I stamped the bottom of the card using the On Solid Ground stamp set from My Favorite Things.  Once it was stamped, I masked it off.  The bricks are from the Brick Stencil from Lawn Fawn.  I used Lost Shadow and Hickory Smoke.  Once the ink was set, I masked the brick off with a piece of scrap paper and some mint tape.  For the moon, I used the Nighttime Sky stencil from Lawn Fawn.  The moon is inked with Squeezed Lemonade, Mustard Seed and Carved Pumpkin.  Using the moon mask from the stencil, and working outwards, with Picked Raspberry, Wilted Violet and Blueprint Sketch.  I spritzed the sky with some water to give the sky a little more interest and then inked the clouds with a white pigment ink.  

I am really pleased with the way this came out.  


When my ink is set, I will use a die to cut this to 4.25" x 5.5"  

To finish up the background, I will use a 1/4" piece of medium gray cardstock to top off the brick wall and stamp the sentiment in the moon.  

All the puppies are from the Whimsey Stamps Doggies Halloween stamp set.  They are all colored with Copic Markers in the following colors:

  • YR21, YR23, YR24
  • E30, E33, E35
  • C2, C5, C7
  • V12, V15
  • YR12, YR16, YR18
  • YG01. YG03
  • R24, R27, R39
For the cobblestone, I just used a variety of gray colors.


Once I had my little friends placed, I felt like the sky needed a little something extra.  I cut some bats out of a dark gray cardstock using the bats from the Build A Graveyard Die Set from Whimsey Stamps.  

I hope you find this card as cute as I do.  Thanks for stopping by and I hope you have a great day!

Sandy


Spooky Wishes!


 Hello!  I had a lot of fun this past weekend playing with Distress Oxide Inks and stencils.  I think creating backgrounds might be my favorite things to do.  They never turn out the same and you aren't sure what you are going to get.  

I wanted this to be a shaker card using the Build A Graveyard Die Set from Whimsey Stamps.  Using my little friends to figure out where the best placement would be, I cut the headstone using one of the dies.  Once I had my gravestone cut, it was really easy to determine where I wanted the moon when I was ready to ink it.  

For the background on the card, I started with the Grassy Stencil from Lawn Fawn.  I used Twisted Citron for the grass and then added a little Mowed Lawn to add some dimension.  Once that was "dryish", I covered the grass with the upper side of the stencil and then moved on to the moon.  I placed the Nighttime Sky Stencil from Lawn Fawn where I wanted my moon.  For the moon, I used Lost Shadow and Hickory Smoke ink.  Using the mask that comes with the stencil set, I inked the sky starting from the edge of the moon moving out.  The colors are Salvaged Patina, Peacock Feathers and Chipped Sapphire.  The trees were stenciled with a really fun stencil from Whimsey Stamps called Halloween Tree and Grass Stencil.  This stencil has so many trees that it is hard to select the perfect one.  I inked the trees with Black Soot.  

I love this background!!

Now that I have my background inked, I will use a die to cut it down to 4.25" x 5.5".  I cut the inside part of the gravestone out of a dark gray cardstock and inked it just a little with some Black Soot to give it some dimension.  I used a stamp from Pretty Pink Posh's Halloween Corners stamp set for the sentiment.  

Once I have my shaker card put together, I will place my little friends at the bottom of the card.  These little pups are from the Whimsey stamp set called Doggies Halloween.  Aren't they just adorbs?  They have been colored using Copic Markers in the following colors:

  • YR21, YR23, YR24
  • E30, E33, E35
  • C2, C5, C7
  • V12, V15
  • YR12, YR16, YR18
  • YG01. YG03
  • R24, R27, R39


This was a fun card to make but I am a bit partial to dogs.  I hope you have been inspired to either make this card or make the background for another Halloween card that you are creating.

Thanks for stopping by and I hope you have an amazing day!

Sandy


Namasleigh


Hello, it's Sandy again.  Today I have a really punny Christmas card.  These little guys are just so busy practicing yoga that I'll bet they don't even notice the cold.     

For this card, I used the stamp set Namasleigh from Gerda Steiner Designs.  Her illustrations have so much personality.  

For the background, I used Distress Oxide Ink in Prize Ribbon, Salty Ocean and Tumbled Glass.  I love this color combination for a cool, yet bold winter background.  If this card hadn't been a mini slimline, I would have also added a little Black Soot at the top, but I didn't feel like I had enough blending room for another color.  For the snow, I used the Snowy Sky Stencil from Lawn Fawn with some white stencil paste.  I used Lawn Fawn's Stitched Simple Wavy Borders to cut the "snow" covered ground from white cardstock.  I added a little B000 Copic ink to the upper edge and under their feet to give it a little of dimension.  

The coloring was done with Copic Markers in the following colors:

  • T0, T2, T5, T7
  • G12, G14, G07
  • R24, R29, R39
  • YR04, YR09
  • E51, E53, E55, E57
  • E01, E02
  • B000
For the sentiment, I used Henry's ABC's and heat embossed them with white and black embossing powder.  I also heat embossed the "Namasleigh" with embossing powder and then cut it like a speech bubble.

I really enjoyed making this card and I hope it has been a little bit of inspiration for you!

Thank you for stopping by and I hope you have great day!

Sandy


Thursday, September 19, 2024

Spooky!


Hello.  For this card, I decided to use some of my older stamp and die sets from Lawn Fawn.  Sometimes I get so caught up in the new releases, that the older ones just get filed away.  

The background on this card was ink blended with Squeezed Lemonade, Mustard Seed, and Carved Pumpkin for the moon.  I used the Nighttime Sky Stencil to help me get the perfect circle.  The sky was blended with Salvaged Patina, Peacock Feathers, and Uncharted Mariner Distress Oxide Ink.  I spattered a little metallic silver water color on the sky to add just a little bit of sparkle.  

I cut the ground from Cilantro cardstock using the Grassy Border die and touched up those edges with a little Mowed Lawn Distress Oxide Ink.  

The pumpkin was cut out using the Pumpkin House die.  I cut it from Sunflower cardstock and then touched it up and speckled it with Carved Pumpkin ink.  Instead of using the door and window dies from that set, I used the ones from the Build A House Halloween Add On.  I backed those openings with pearlized vellum colored with yellow marker to give them a little glow.  

I used the Spooky Gate die for the fence.  The banner was cut from Canned Pumpkin cardstock using the Fishtails Banner die cut. 

The stamp sets that I used are:

  • Costume Party
  • Spooktacular
  • Simply Celebrate Fall
  • Claire's ABC's

All the coloring was done with Copic markers in the following colors:
  • YR02, YR07, YR18
  • Y21, YR21, YR31
  • C1, C3, C5
  • E33, E35, E37
  • E00, E11
  • V04, V06, V09
  • YG00, YG01, YG03
  • B000, B01, B02
These little friends look like they are having the best time trick or treating don't you think?

Thanks for stopping by and I hope you have a great day!

Sandy


Happy Fall!


Hello! We so close to it officially being fall and I am so happy!  It is my absolute favorite time of year.

For this card, I used Lawn Fawn's Linden paper from the Falling Leaves collection.  That blue is just so yummy!  The sunflowers, sunflower centers and sentiment are cut from the yellow, orange and beige plaid paper from the Falling Leaves Petite Paper pack.

I used the new Lawn Fawn Sunny Sunflower die for the flowers.  Once they were cut I touched up the edges with Carved Pumpkin Distress Oxide Ink,  The centers are touched up with Frayed Burlap Distress Oxide Ink.  


I used the Large Slimline with Sliders die to cut out the background.  I touched up those edges with Salty Ocean Distress Oxide Ink.  I cut the sentiment using the Giant Happy Fall die.  I cut it once from the patterned paper and then again from Paper Bag Cardstock.  


The little leaves were left over from a card I previously made.  They are the little leaves from the Fall Leaves Backdrop.  

This little mice are from the Bubbles Of Joy and You Autumn Know stamp collections. 

I think this card is just so darn cute!  Thanks for stopping by today and HAPPY FALL!!!!

Sandy

Tuesday, September 17, 2024

BOO!


Hello!  Today I have a really quick Halloween card for you.  In fact it would be so easy to do several in an afternoon.

This little ghost is an illustration by Gerda Steiner Designs, called Boo-Cute Ghost.  It is a digital stamp.  

I used him at full size because he would fit perfectly in my Thorny Frame Die from Whimsey Stamps.  To add a little more spookiness to the background, I cut purple cardstock with the Quilted Stars Backdrop from Lawn Fawn.  I used a yellow cardstock underneath for the star openings.  The background behind the ghost is just a piece of scrap paper that I had on my desk.  I had used it cut leaves out for another card but it was perfect for this card.  To add a little more “pop” to the card and a nice edge finish, I used a orange frame cut from cardstock.  

I colored him in using Copic Markers in the following colors:

  • B000
  • YG00, YG01, YG03

He sure is one cute ghost don’t you think?

Thanks for reading and I hope you have a great day!


Sandy


Wednesday, September 11, 2024

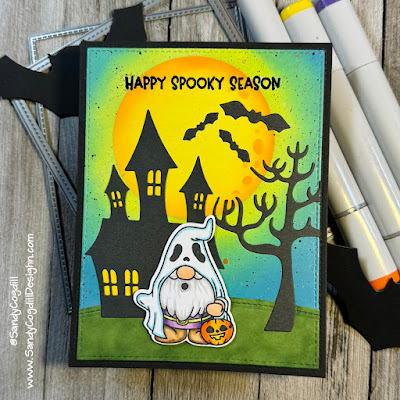
So Fa-BOO-lous!


Don't you think this little Gnome is absolutely Fa-BOO-lous?  I sure do.  He is from Trinity Stamps and believe it or not, he is from the Fa-boo-lous Stamp and Die set.  I love this set because the die comes with the stamp.  

I am crazy about this background.  I think it super colorful, yet not too spooky.  I used the Lawn Fawn stencil set called Nighttime Sky.  I started by inking in the moon with Squeezed Lemonade, Mustard Seed and some Carved Pumpkin on the outside edges.  I also used the Carved Pumpkin with the stencil's craters to add just a little "more" to the moon.  Once I had my moon done, I used the mask that comes in the stencil set to cover my moon.  I then inked around it using Twisted Citron, Cracked Pistachio and Broken China.  I love this combination and I am sure that I will be using it on other cards.  

The ground is cut using Lawn Fawn's Stitched Simple Hillside Border.  It is cut from a medium green cardstock and then blended with a little Rustic Wilderness Distress Oxide Ink.  

The house and the tree are from a really old My Favorite Thinks Dienamics Set called Spooky House.  This is one of my favorite sets.  It comes with a couple of lamp posts, clouds, bats and a moon.  I have used the clouds from this set many times for everyday cards.  These were cut from a very dark gray, almost black, cardstock.  I touched up the edges with a little Lost Shadow Distress Oxide Ink.  

This little spooky friend was a quick color.  I used Copic markers in the following colors:

  • T0, T2, T7
  • E11, E93
  • V12, V15, V05, V17
  • B02
  • E53, E55, E57
  • Y35, YR04, YR07


I though about maybe adding a few things to the bottom of the card, but I was afraid it would take away from the impact of that beautiful nighttime sky.  

The sentiment is from the Hocus Pocus stamp collection.  I heat embossed it directly on the background with black embossing powder.

Thanks for stopping by today and I hope you will enjoy the "Spooky Season"!

Sandy


Conjuring Up Some Magic!


 Moving right along with my Gnome Halloween cards, this one is also a Trinity Stamps Gnome (my favorite Gnomes).  He is from the Hocus Pocus stamp set.  

For the backgound on this card, I used Twisted Citron, Peacock Feathers and Salty Ocean Distress Oxide Ink.  I wanted to add a little sparkle to the background, so I used a Lawn Fawn Hot Foil Plate called, Starry Sky Background Hot Foil Plate, along with some gold Glimmer Foil.  I didn't foil as nicely as I hoped it would but I don't think I left my background enough time to dry thoroughly.  Also, hot foil can sometimes be a little finicky, so that might be it also.  


I used the Lawn Fawn Simple Stitched Hillside Border for the ground he is standing on.  I also used their Stitched Rectangle Frames for the frame on this card.  I inked the edges of both of those pieces with a little Rustic Wilderness Distress Oxide Ink.  

I used the A-2 Tree Frame die to cut out the frame from some Purple cardstock.  I inked those edges with a little Villainous Potion Distress Oxide Ink.  

I used Copic markers to color my little friend in the following colors:

  • T0, T2, T7
  • V12, V15, V05, V17
  • E53, E55, E57
  • Y21, Y23, Y26
  • YG00, YG01, YG03
  • Y11, Y13, Y15
  • Y35, Y38, YR04, YR07
  • B01, B04, B05, B06


The sentiment is also from the stamp set.  I heat embossed it with black heat embossing powder.  One of the other things I really like about Trinity Stamps is that there is often a die that cuts out the sentiment and I really like that look but really hate to fussy cut those.  

To glitz up the card, I added some bats cut from black glitter cardstock, rhinestones and a little moon for the upper right corner.

He definitely is conjuring up so magic, don't you think?

Thanks for stopping by and I hope you have a magical day!!

Sandy


What's Brewin?


Hello!  Today I am back with those cute Gnomes from Trinity Stamps.  As I have said before, I love Gnomes and my favorite Gnome Stamps are always from Trinity.  This witch brewing up a potion is from the Hocus Pocus stamp set.  I decided to make this card a shaker, because they also released a new Embellishment Mix called Non-Toxic.  It is just the best with the little cauldrons and potion bottles.  And the confetti pieces are perfect for Halloween.


For the background on this card, I used Wilted Violet, Villainous Potion and Shaded Lilac Distress Oxide Inks.  After I had it inked and blended, I spritzed it with water to give it a little more texture.  For the ground, I used the Simple Stitched Hillside Border die from Lawn Fawn, to cut the grassy area from green cardstock.  I also glued a few little bats on the background to add a little interest in the sky when the sprinkles are settled at the bottom of the card.  

For the top of the card, I used the new A-2 Tree Frame Die to "frame out" my card.  I cut this from a medium gray cardstock.  On the edges for the frame, I blended in a little Black Soot Distress Oxide Ink to not only soften the edges, but to  add a little texture to it.  


I used Copic markers to color in my little witch with her cauldron in the following colors:

  • T0, T2, T7
  • V12, V15, V05, V17
  • E53, E55, E57
  • Y21, Y23, Y26
  • YG00, YG01, YG03
  • Y11, Y13, Y15
  • Y35, Y38, YR04, YR07
  • B01, B04, B05, B06

Once I had placed my sentiment and Gnome on the card, I felt like I needed a little something in the corners for the card.  I used a few green rhinestones and a few bats.  I also, stamped out another potion bottle for the lower right corner.

I really had a fun time making this card.  I hope it inspires you to create one of your own.

Thanks for stopping by and I hope you have a fantastic day!

Sandy


Tuesday, September 3, 2024

Little Woodland Library


This is "literally" the cutest stamp set from the new Lawn Fawn release.  I don't know about you, but I love all the little libraries that are around the neighborhoods.  We have one directly on the trail I use to walk Quincy, and he knows that we stop pretty much every time to see what's been added or for me to add a book.  

As I was making the card that I posted yesterday, I was thinking about doing a similar one but not in fall colors and I wanted to put a couple of critters in the tree branches.  The Spooky Forest Backdrop was just perfect for this card.  I did use the leaf die from the Leafy Tree Backdrop-Vertical.  

I inked a piece of white cardstock with Rustic Wilderness, Shabby Shutters and Bundled Sage Distress Oxide Ink,  to create the shading for the leaves.  I really like doing this - it is so much quicker and easier than stamping and coloring each leaf.  I also touched up the edges of the grass that I cut out with the Grassy Border die.  For the sky, I used the Cloudy Stencil along with Tumbled Glass ink.


All the coloring was done with Copic markers in the following colors:

  • Y02, Y08, Y19
  • G40, G43, G46, TG67
  • YR02, YR04
  • BG000
  • R35, R37, R39
  • B00, B01, B02
  • C0, C1, C3, C5, C7
  • YR21, YR24, YR27
  • E31, E33, E35, E37, E39

I used the All The Speech Bubbles dies to cut out the two little blurbs.  

The frame that was cut from the Falling Leaves Petite Paper Pack using the Stitched Rectangle Frames.

Don't you think this would be the perfect card for a book lover or teacher?  I hope you are inspired to make one of your own.

Thanks for stopping by and I "literally" hope you have an amazing day!

Sandy


Monday, September 2, 2024

Wishing You A Brew-tiful Fall!


 Hello! Hello!  Today I have a card that I created using Lawn Fawn's new Treat Cart Add On: Coffee stamp set.

I loved the sentiment, " Wishing You A Brew-tiful Fall", so I decided to go with a fall theme.  

I knew that I was going to need a lot of leaves, so I inked up just a piece of white cardstock with splotches of Distress Oxide Inks in Mustard Seed, Ripe Persimmon, Fired Brick and Carved Pumpkin.  I cut the leaves out using the leaf dies from both the Vertical and Horizontal Leafy Tree Backdrop.  This was so much quicker than stamping and coloring each leaf.  


Next, I stamped and colored the different elements from the Treat Cart stamp set along with the Treat Cart Add On: Coffee.  I used Copic Markers in the following colors:
  • Fox - YR20, YR14, YR24, YR27
  • Owl - E30, E31, E33, E55, E57
  • Bear - E53, E43, E47
  • Cart - BG45, BG49, BG09, R35, R37, R39, E30, E31
For the background, I had originally used the Cloudy Stencil and inked clouds, but I didn't like the way the blues worked with the teal color on the treat cart.  I decided that the tan colored paper from the Falling Leaves Petite Paper Pack, would be make a cute background with the falling leaves.

For the ground, I used the Simple Stitched Hillside Border with Algae cardstock.  I cut the tree from Paper Bag cardstock, using the Horizontal Leafy Tree Backdrop die.  Using the Stitched Rectangles die, I cut the frame from another piece of patterned paper from the Falling Leaves Petite Paper Pack.  

Some of the leaves are glued directly on the background, while others are popped up to give the card some dimension.  I used foam squares on the treat cart, critters and sentiment banners also.  

I think this card is just adorable and I hope you think so also.

Thanks for stopping by and I hope you have a "Brew-tiful" fall.

Sandy

Sunday, September 1, 2024

You're So Spell-cial To Me


 Hello!  Happy September.  We are finally in the "ber" months.  Yay!

It had been quite awhile since I had played around with my Glimmer Hot Foil System so I thought that I would do a card with the new Lawn Fawn Bokeh Circles Hot Foil Plates. The circles made me think of bubbles, so pulled out the new Build A Cauldron Die and Book Collection Dies.  I also used the little books from the new Stitched Bookmark Die.

For the background, I inked white cardstock with Wilted Violet, Milled Lavender, and Villainous Potion Distress Oxide Ink.  Once that was blended, I used the piece that looks like a corner piece and hot foiled it with Opal Glimmer Foil in each of the corners.  It is very subtle but I really like the way it turned out.

I also inked a small piece of cardstock with Squeezed Lemonade, Twisted Citron and Mowed Lawn.  I cut the foam and drips from the green/yellow cardstock.  I also used the Bokeh plates with Citron Glimmer Foil for the bubbles.  

I cut the books from inked scrap paper using the Book Collection dies along with the little books from the Stitched Bookmark die.

I used the sentiment from the Purrfectly Wicked stamp set.  I heat embossed it using white heat embossing powder.  

That pretty much does it for this card.  It was fun to play with hot foil again and I need to do that more often.

Thank you for stopping by and I hope you are having a great day!  

Sandy